When working on local development, especially with services like Nextcloud, Laravel, or custom web apps, you might need HTTPS. However, browsers don’t trust self-signed certificates by default. This guide will help you generate and trust a self-signed SSL certificate for mydomain.local (or any other local domain).
Step 1: Create an OpenSSL Configuration File
First, create a file named req.cnf with the following content:
[req]
distinguished_name = req_distinguished_name
x509_extensions = v3_req
prompt = no

[req_distinguished_name]
C = US
ST = California
L = Los Angeles
O = Organization Name
OU = IT Department
CN = mydomain.local

[v3_req]
keyUsage = critical, digitalSignature, keyEncipherment
extendedKeyUsage = serverAuth
subjectAltName = @alt_names

[alt_names]
DNS.1 = mydomain.local
DNS.2 = localhost
Replace MyCompany, California, and Los Angeles with your actual details if needed.
Step 2: Generate the Self-Signed Certificate
Now, use the following command to generate a self-signed certificate valid for 1 year (365 days):
openssl req -x509 -nodes -days 365 -newkey rsa:2048 -keyout mydomain.local.key -out mydomain.local.crt -config req.cnf -sha256At this point, you have three important files:
mydomain.local.key– Private keymydomain.local.csr– Certificate Signing Requestmydomain.local.crt– Self-signed certificate
Step 4: Install the Certificate on Windows 11
To make the certificate trusted, you need to add it to Windows’ trusted root store:

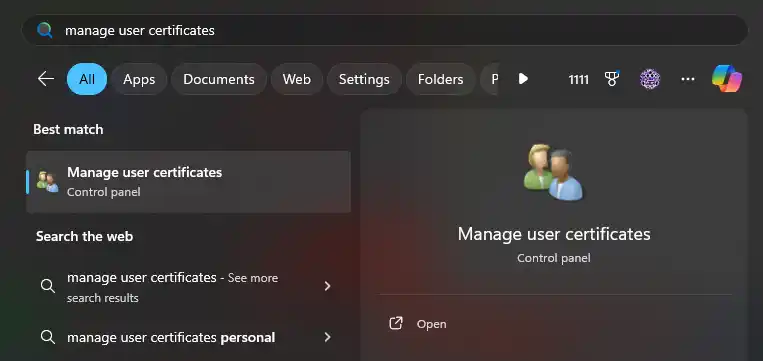
1. Press ⊞ Win key and search for “Manage User Certificates”.
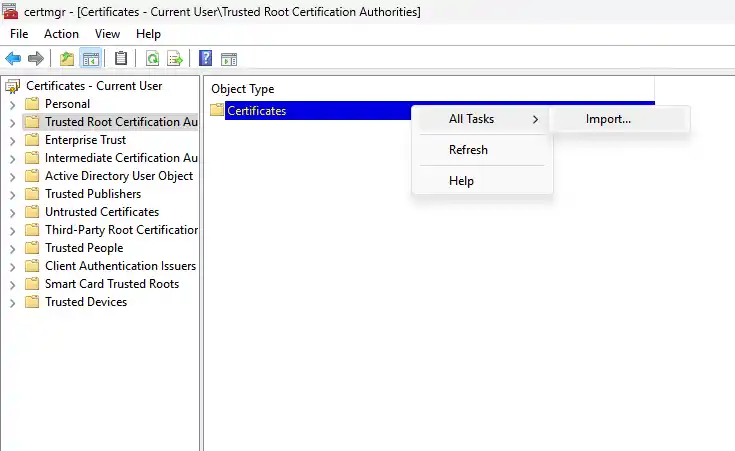
2. Click OK and navigate to Trusted Root Certification Authorities → Certificates.
3. Right-click the folder and choose All Tasks → Import.

Select the certificate file you created earlier mydomain.local.crt, follow the wizard, and place it in Trusted Root Certification Authorities.
After doing this, your browser will no longer show SSL warnings for https://mydomain.local.
Step 5: Configure Your Web Server
If you’re using Apache or Nginx, configure them to use the certificate. Change paths as needed.
For Apache:
<VirtualHost *:443>
    ServerName mydomain.local

    SSLEngine on
    SSLCertificateFile "C:/path/to/mydomain.local.crt"
    SSLCertificateKeyFile "C:/path/to/mydomain.local.key"
</VirtualHost>
For Nginx:
server {
    listen 443 ssl;
    server_name mydomain.local;

    ssl_certificate /path/to/mydomain.local.crt;
    ssl_certificate_key /path/to/mydomain.local.key;
}
Restart the web server, and your local development site should now be accessible over HTTPS without security warnings.
This tutorial ensures that you can always create and trust a self-signed certificate whenever needed.


Leave a Reply